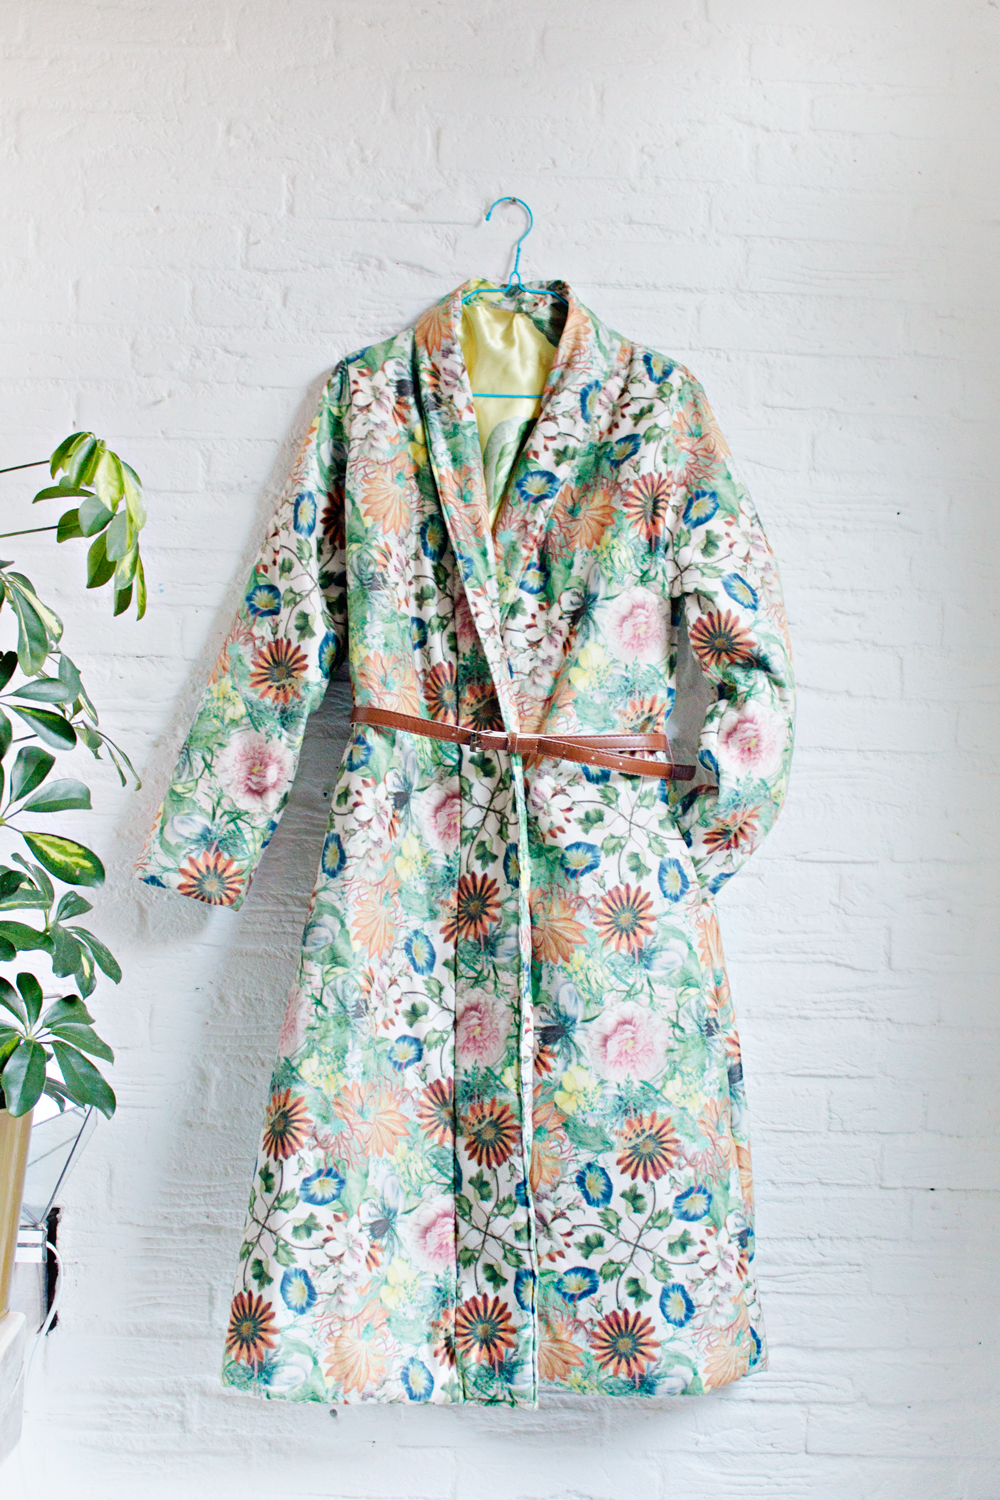
Today I am sharing my collaboration with the amazing Spoonflower with you! I designed my own fabrics and used them for this robe coat project. I documented every step of the way, to make sure that you can also do this project at home and design your own fabric and make your own coat!
Let’s start at the beginning: Spoonflower, which is an awesome digital printing company that prints custom fabric, wallpaper, and gift wrap, opened a new location right around the corner from my house. I already was a big fan of their work, and grabbed the opportunity to stop by and take a look at what they do. And after seeing the entire process of how a design get’s printed onto their pretty fabrics and meeting the lovely people behind the scenes of such a creative company, I was thrilled to start my own project and share it with you!
The project
I have always wanted to make my own (winter) coat, since every year I struggle with finding the right colourful long coat for my figure (I am sure that I am not alone in this). Spoonflower has a very pretty faux suede fabric and it inspired me to use that for this coat project.
For the design, I went to my favourite inspirational source: the website of the Dutch Rijksmuseum. This museum offers a great archive of beautiful paintings and lets you download and use them for free (see also my temporary tattoo project).
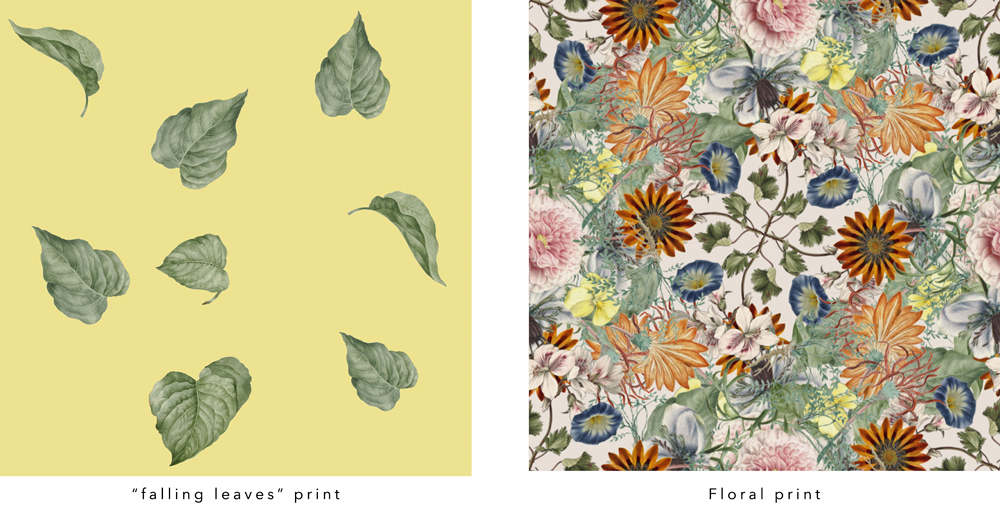
I combined 4 paintings and redesigned them into a new print for the outside of the coat.
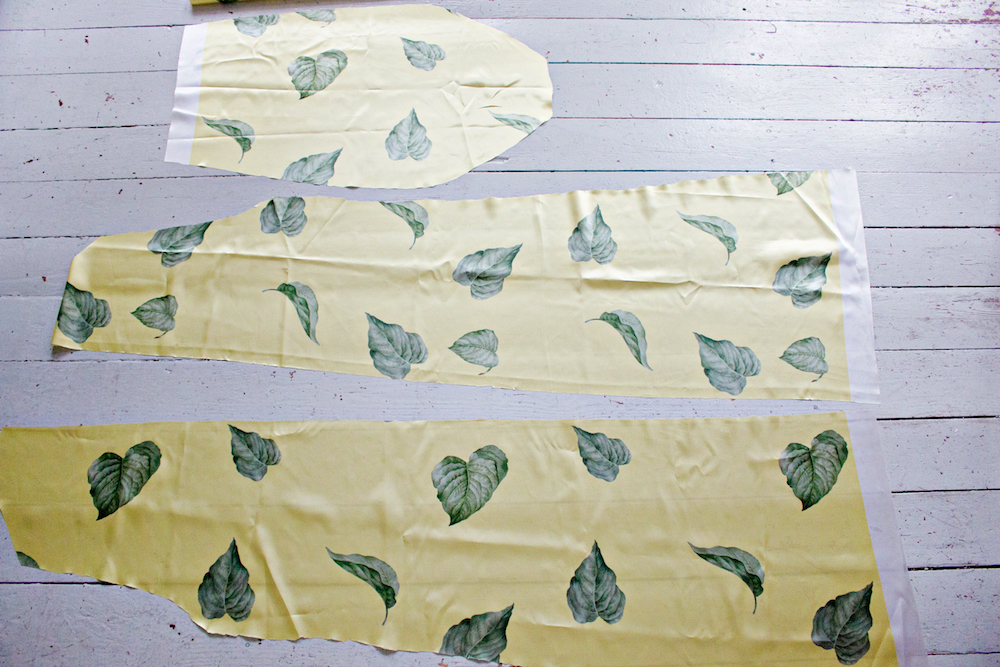
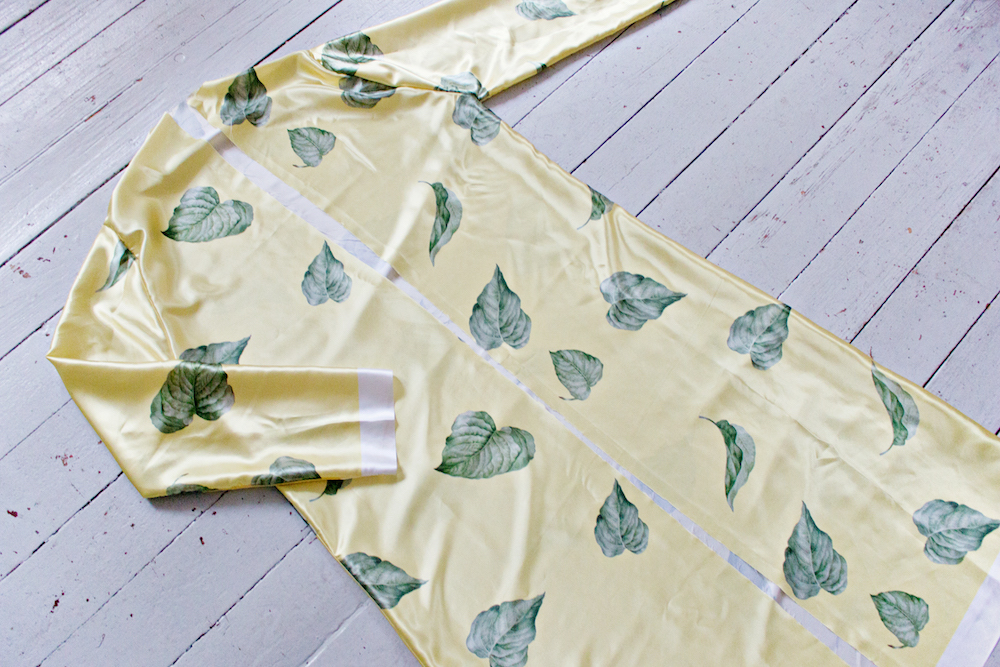
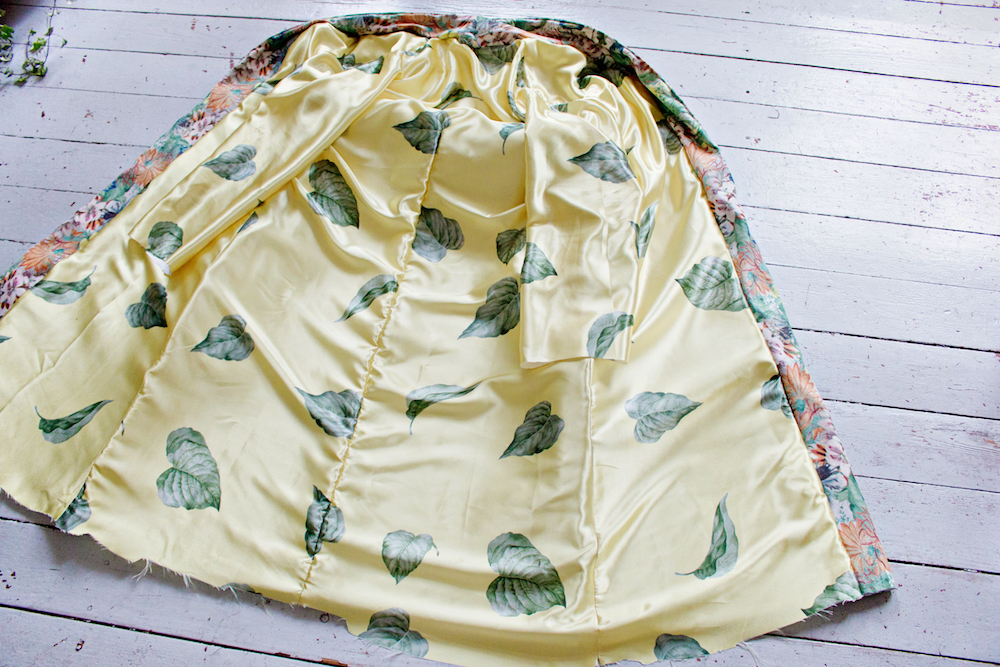
For the lining I used another part of a painting and turned it into a ‘falling leaves’ print.
The timing for this print was perfect, because around the time that I was designing the print, Pantone released their new color of the year: Greenery. How on-trend am I?;)
For you
It wouldn’t be much fun to design and make all of this if I couldn’t share it with you. So this is a very detailed (30 steps to be exact) DIY project to make sure that you can also create this coat yourself!
– No sewing pattern needed, I made this coat project without a sewing pattern!
– You can design your own fabric for this project, or use the print that I designed.
– Don’t need a new coat? You can also simplify this project and use it to make a robe! Just skip the interfacing and lining parts and choose a pretty fabric that works for your new robe.
Are you ready to design and make your own coat? I suggest that you read the full step-by-step below before you start. There are 30 detailed steps to guide you through the process of making a no-pattern coat! And if you have any questions, please don’t hesitate to leave them in the comment section below.
DIY:
MATERIALS
– 4 meters of Faux Suede fabric – Click here to order the fabric used in this project
– 4 meters of Satin lining fabric – Click here to order the fabric used in this project
– 4 meters of Interfacing
– Snap Buttons x2
– Pins
– Scissors
– Sewing machine
– 1 Dress or coat for the basic shape of the coat
– 1 Coat to trace the sleeves
STEP 1
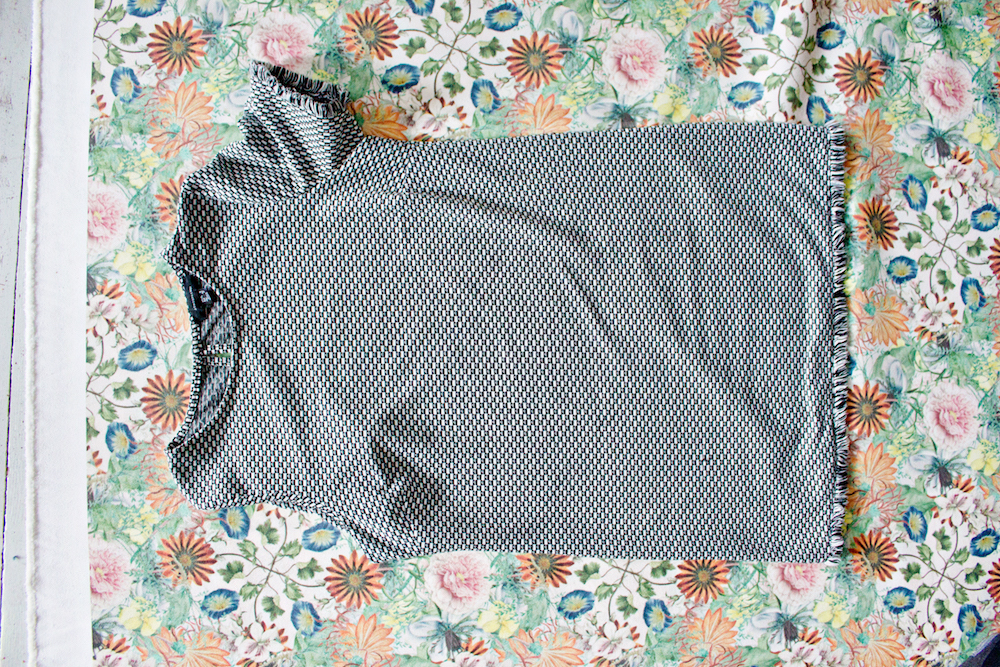
– Place the fabric for the coat on a flat surface. Take a non-stretch dress or coat* in your size and place it flat and widespread onto the fabric. (it doesn’t need to have the length, that can be added later.
– Fold the arms of the dress/coat to the inside, to reveal the shoulder seam of the arm.
** The dress or coat should be a non-stretch a-line model with a high neckline at the back (the front neckline doesn’t matter), preferably slightly too large and definitely not too tight.
STEP 2
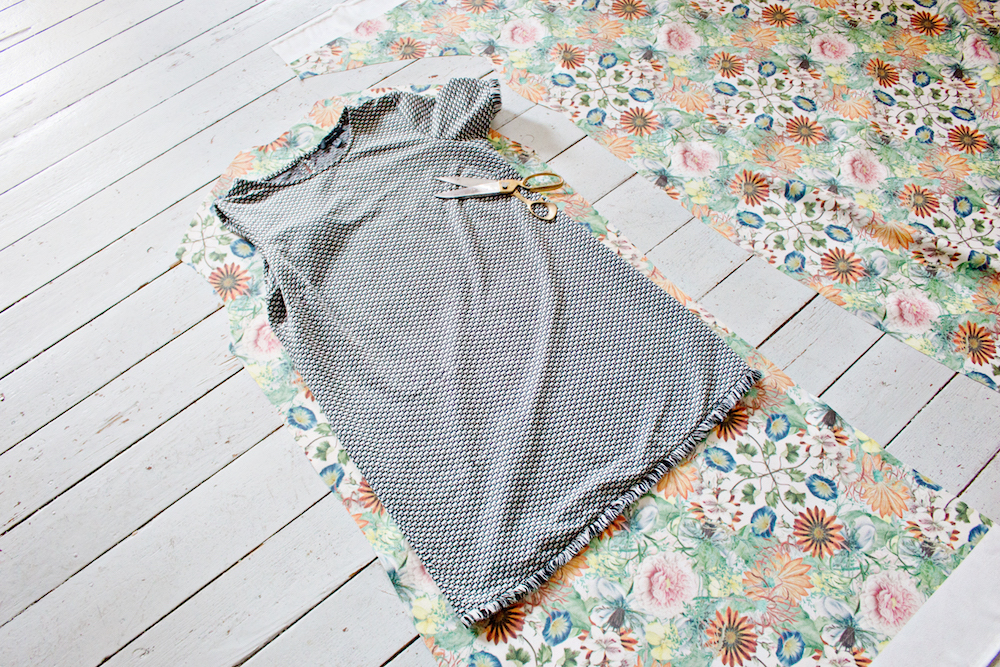
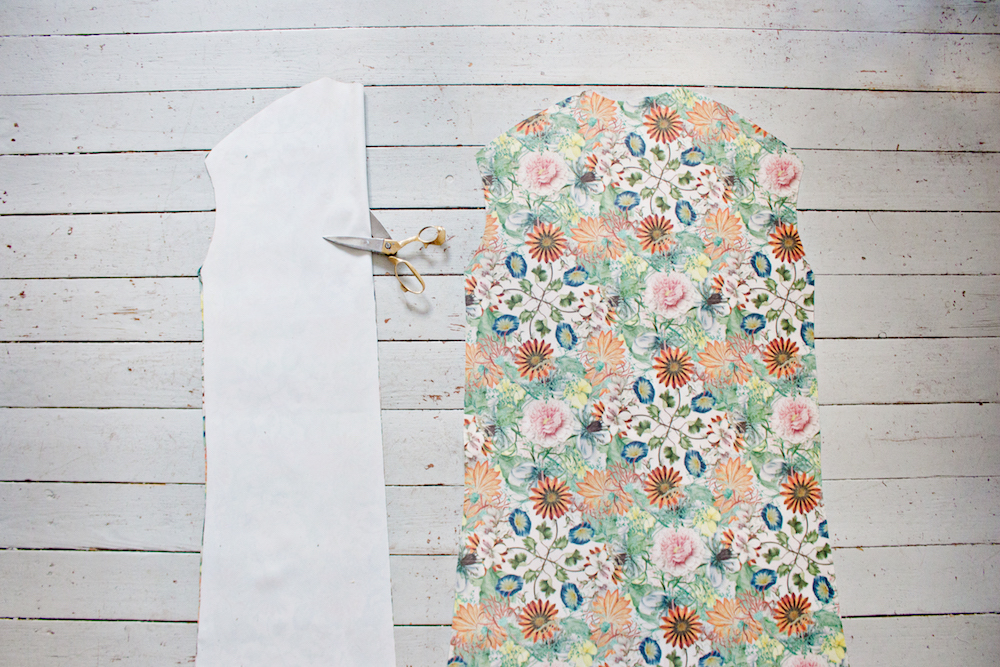
– Decide the length of the coat and use pins to follow the side seam lines until you have reached your chosen length.
– Cut the fabric along the shape of the dress/coat, adding about 3cm around the sides and the top, and the added pinned line at the bottom. (this is 2 extra cm to give room for the padding and 1 cm for the seam allowance)
– Cut this shape again for the front.
STEP 3
– Fold one of the pieces that you made in step 2 vertically double.
– Cut the folded line open with your scissors to create the front opening of the coat.
STEP 4
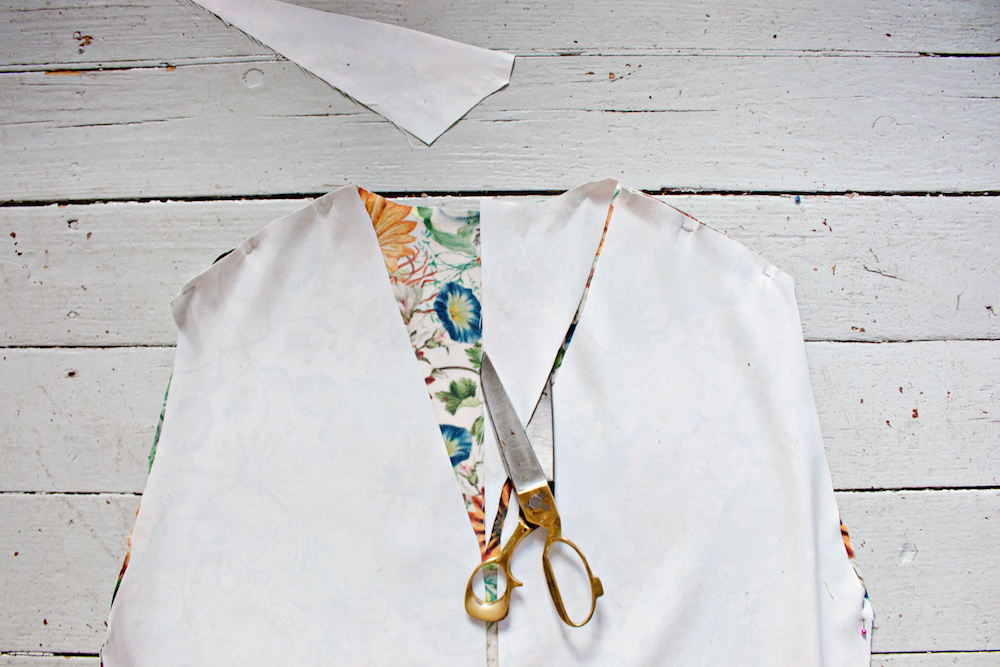
The back piece already has a neckline, but now we have to create the neckline of the 2 front pieces.
– To create a robe/like neckline, improvise by starting to cut a v-shape line from the shoulder seam downwards for about 30 cm. Making sure that the transition to the rest of the front is smooth(see the above photo)
– Repeat this for the other front piece.
STEP 5
– Fold a piece of the faux suede fabric double.
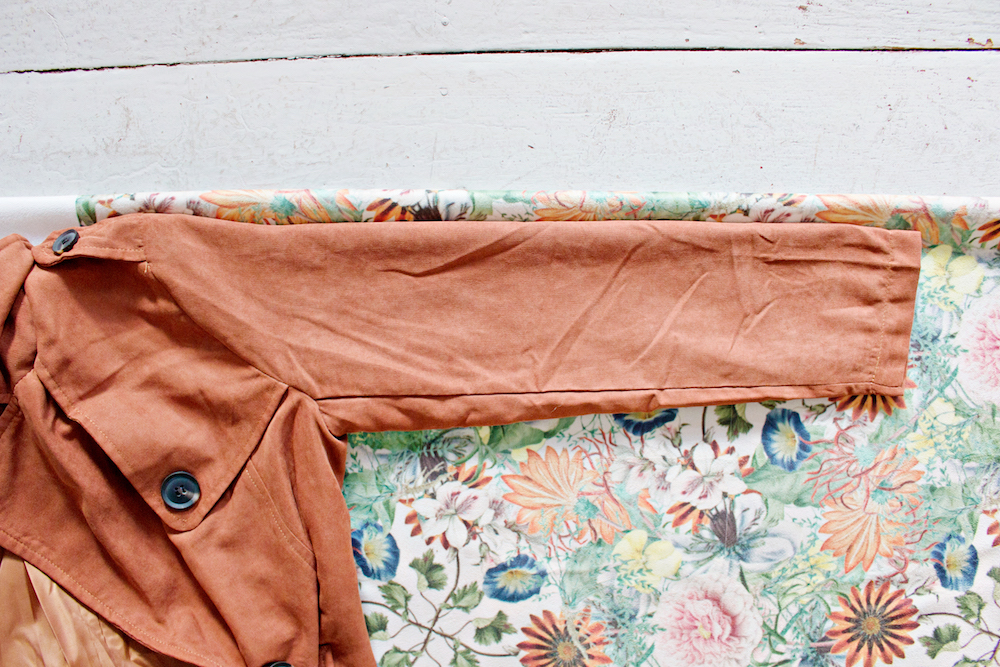
– Place the piece of clothing that you choose for the sleeve pattern onto the folded fabric, with the longest seam (the line towards the shoulder) on the fold of the fabric.
– Trace the line of the sleeve adding 3 cm all around. (this is 2 extra cm to give room for the padding and 1 cm for the seam allowance)
– Cut the fabric with your scissors.
STEP 6
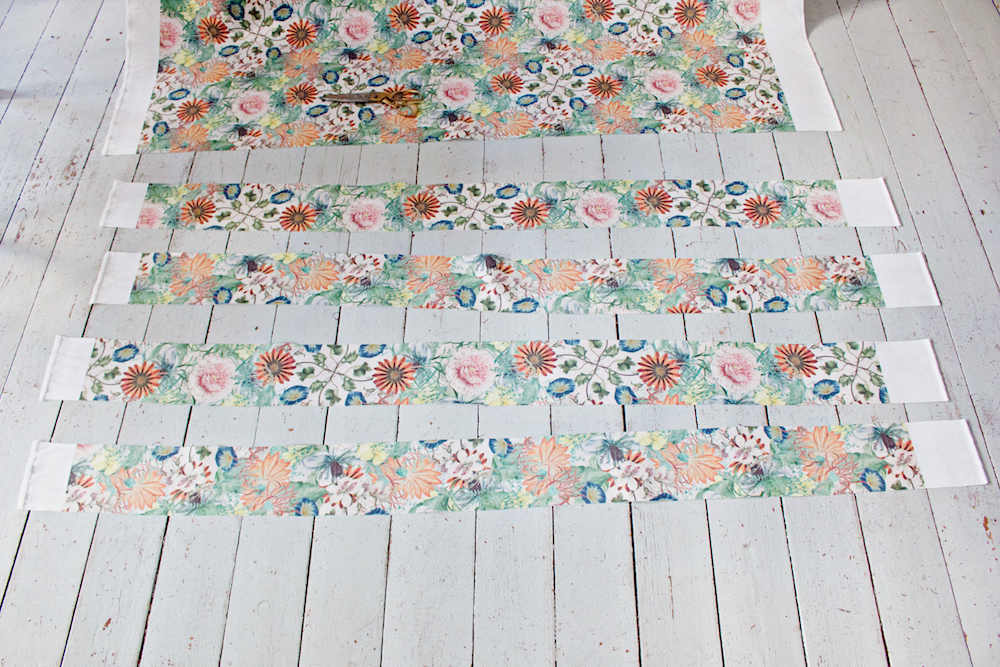
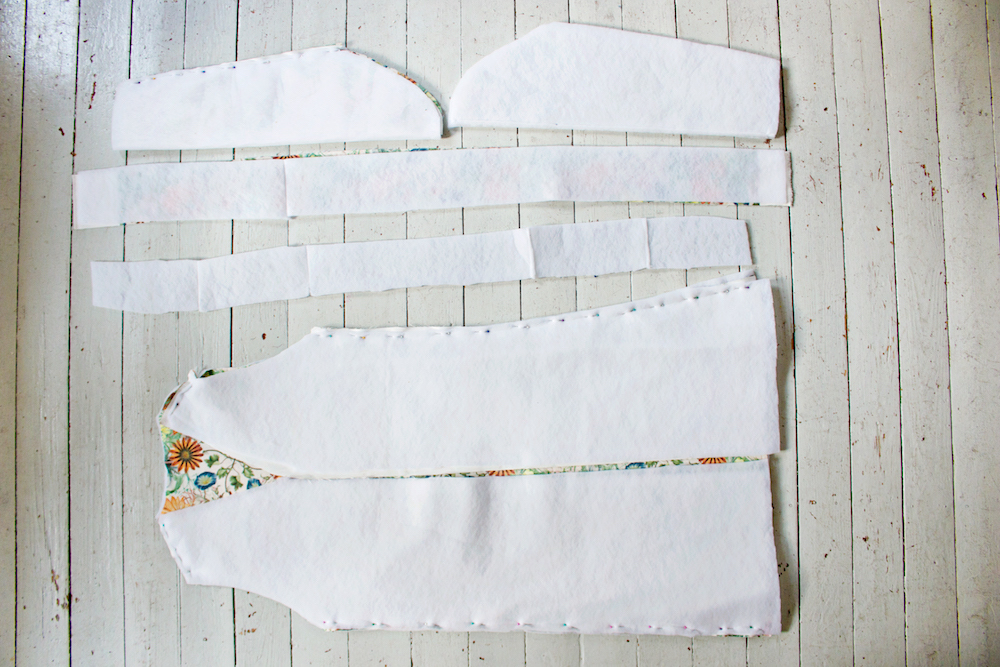
– For the front folded seams, cut out 4 long pieces of faux suede fabric that can cover the entire vertical front of the ‘front seam’ and approximately 12 cm wide each.
STEP 7
– Place the interfacing on a flat surface and trace the: back piece, 2 front pieces and sleeves onto your interfacing fabric.
STEP 8
– Place the lining fabric on a flat surface and trace the: back piece, 2 front pieces, sleeves and 2 of the long strokes onto your interfacing fabric.
STEP 9
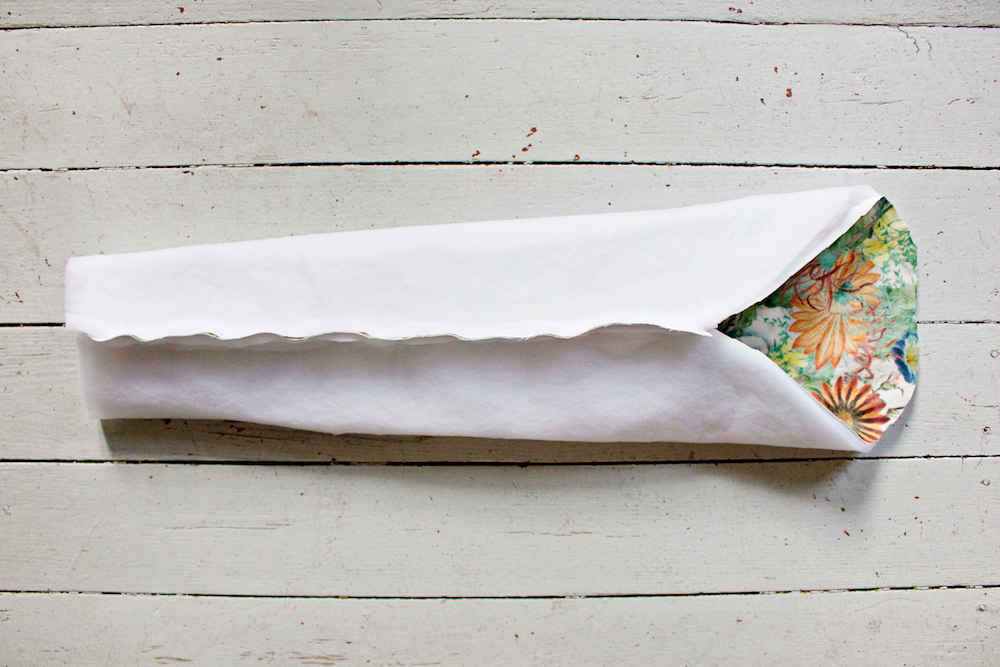
– Place the interfacing of the sleeve fabric on a flat surface.
– Place one suede sleeve pattern piece, right side up, on top of the interfacing.
– Fold the outer sides inwards and pin and sew together.
– Repeat this for the other sleeve and the lining sleeves.
STEP 10
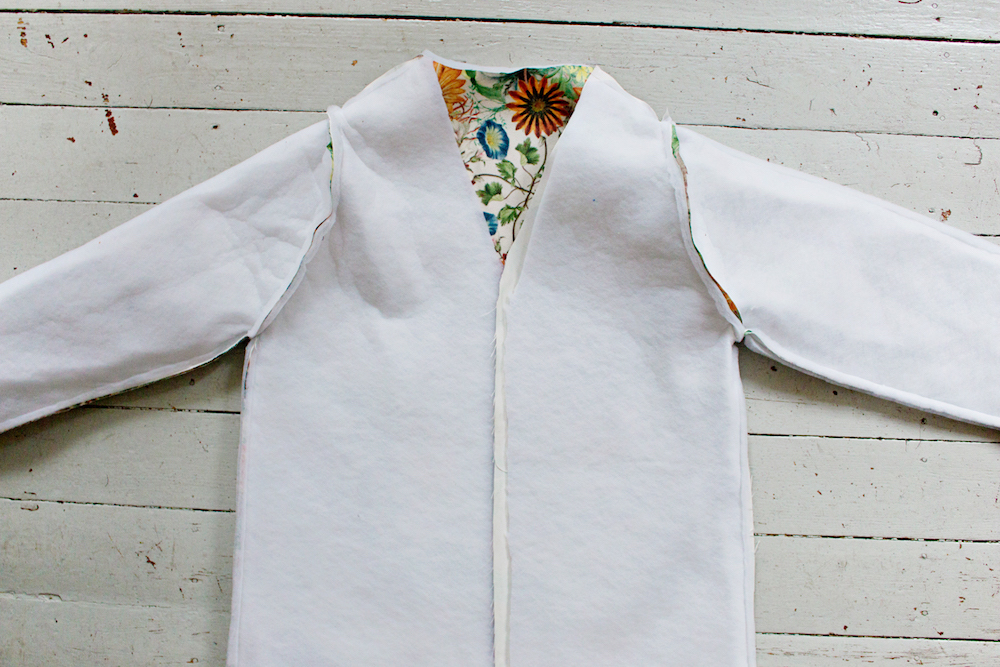
– Place the interfacing back piece on a flat surface with the faux suede back piece on top (right side up).
– Place the two faux suede front pieces on top of that (right sides down). And place the accompanying interfacing on top of that.
– Pin the sides and shoulders together.
– Pin the sleeve into the armholes and sew everything together.
STEP 11
– Place the lining back piece on a flat surface (right side up).
– Place the two lining front pieces on top of that (right sides down).
– Pin the sides and shoulders together.
– Pin the sleeve into the armholes and sew everything together.
STEP 12
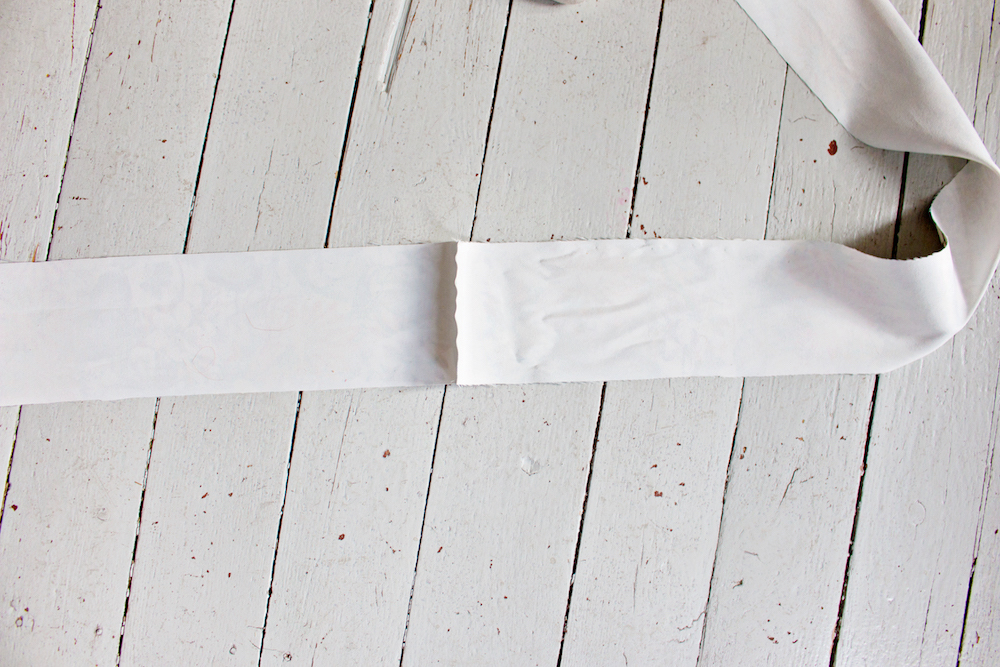
– Turn the 4 strips of faux suede into 2 longer strokes by sewing them together.
– Repeat this for the interfacing.
STEP 13
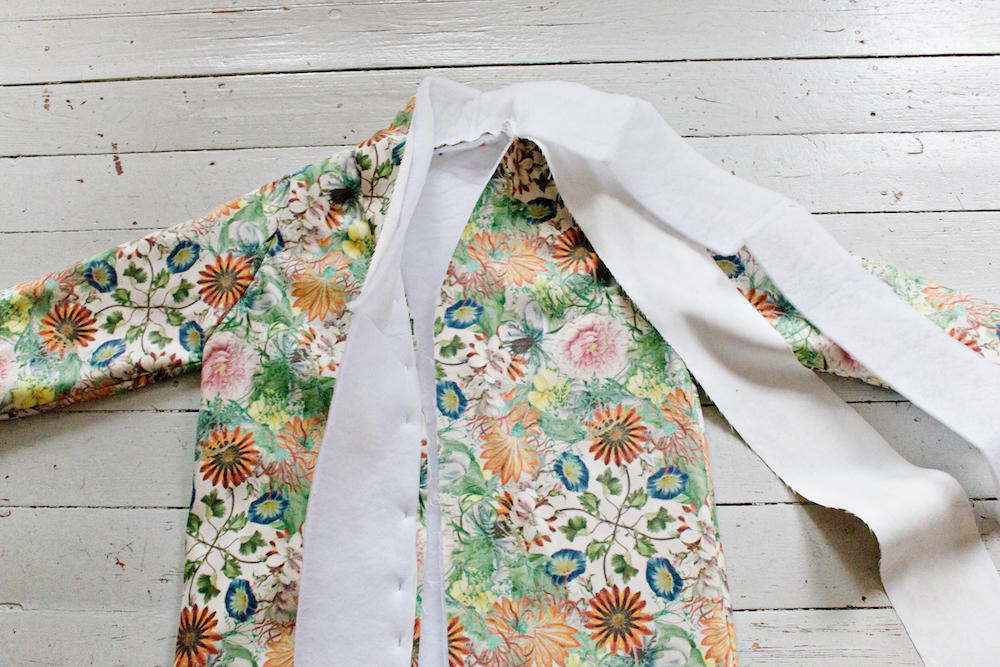
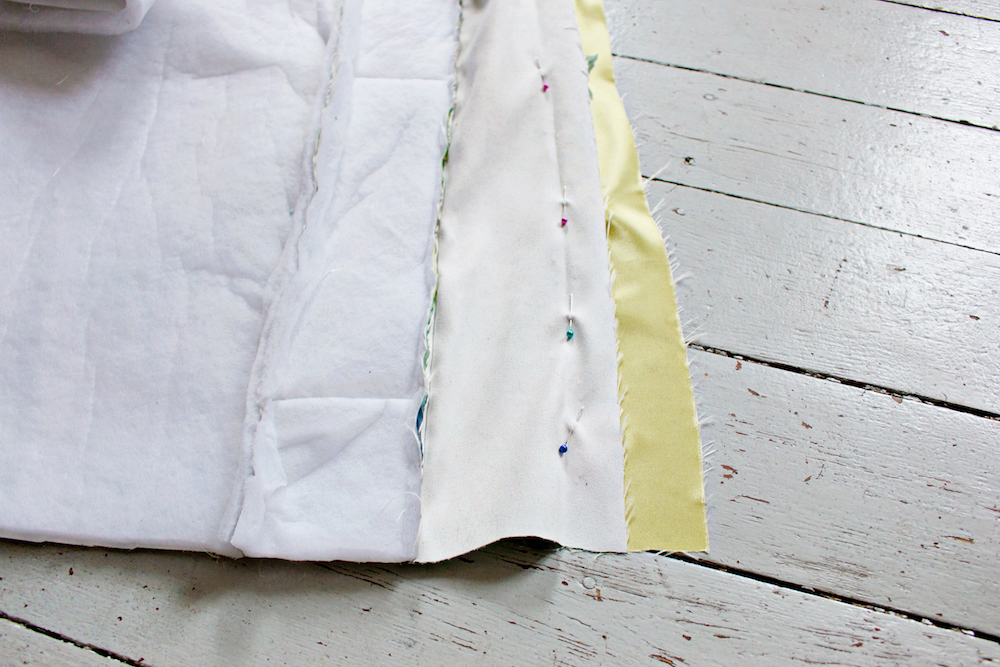
– Place the interfacing on top of one of the long strips of faux suede.
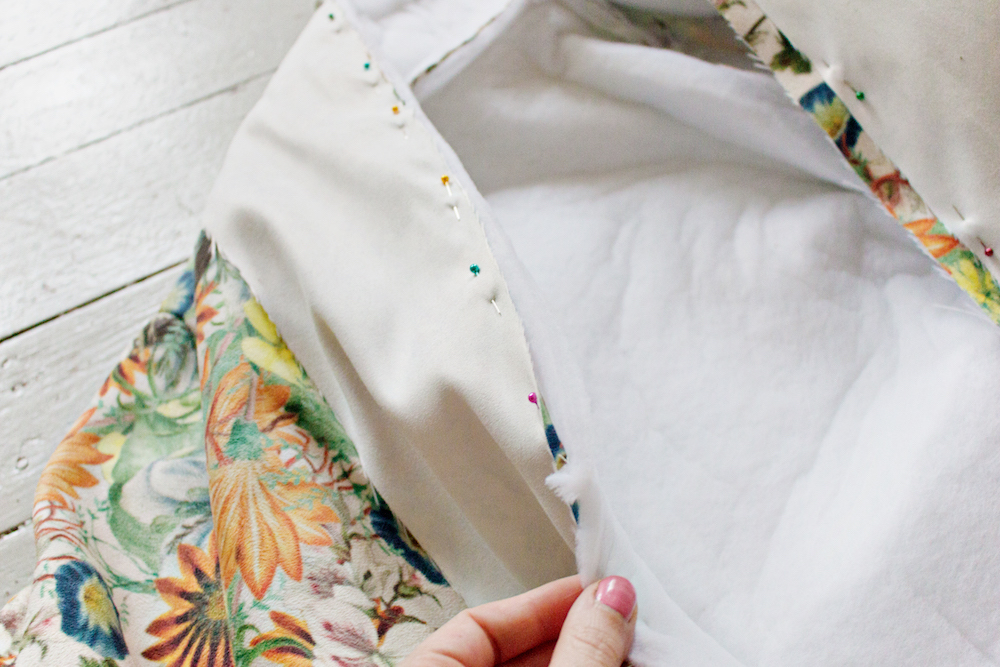
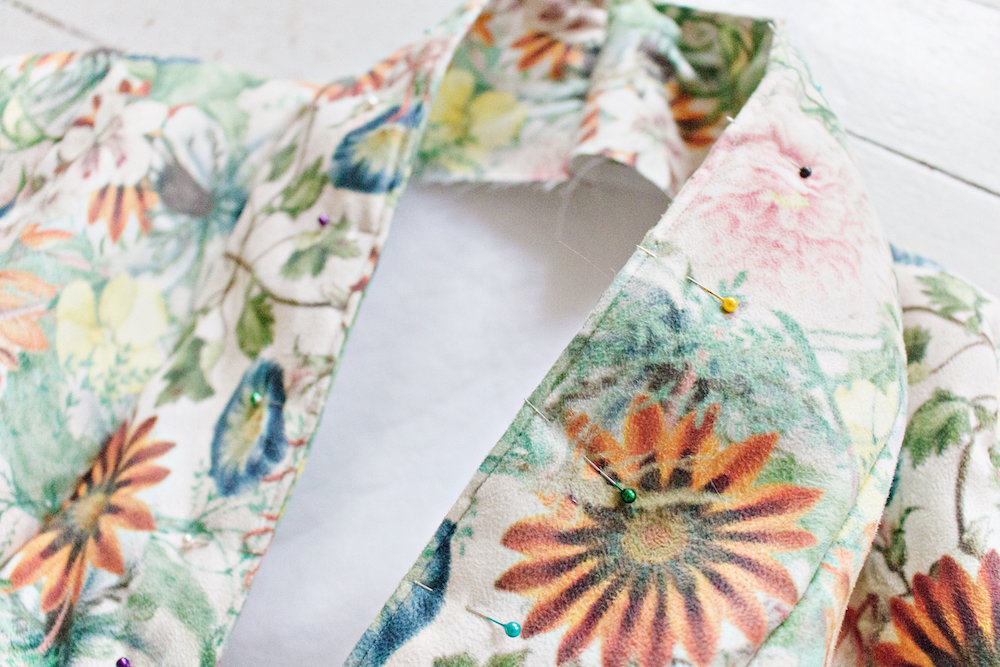
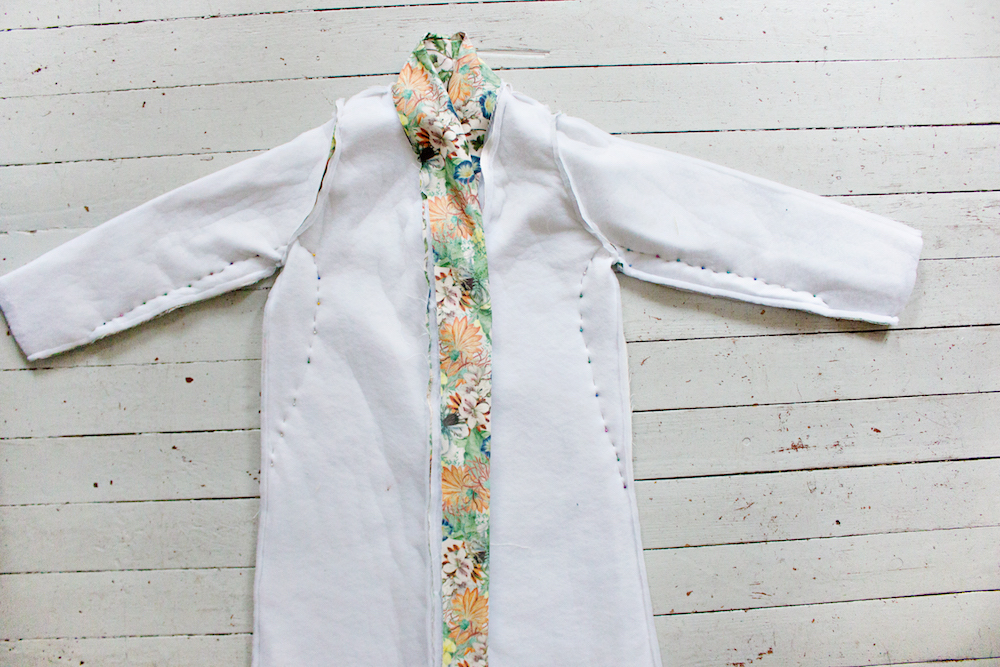
– Attach them to the entire front opening of the coat, starting at the bottom and going all around, pinning the right sides together.
STEP 14
– Once you have pinned the entire front of the coat to the strip of suede and interfacing, sew the pinned layers together.
STEP 15
– Place the second long strip of faux suede fabric, face down, on top of the strip that you have just sewn to the front of the coat (both right sides should face each other).
STEP 16
– Sew the pinned layers together and fold last added strip to towards the inside of the coat.
STEP 17
– Pin and sew the folded part close to the egde to keep the fabric in place.
STEP 18
Try the coat on and see how it fits. Right now it should fall loosely around your body, and the front opening should be able to fit across your stomach and hips.
– If you want the coat to have a more tailored look, you can use this step to make a few adjustments*, I decided to create a smaller waist and slightly tighter sleeves. Pin everything first, and try the coat on again to see how it fits and once you are happy with the look, sew the pinned lines and cut off any excess fabric.
** If the adjustments are minor, you can continue to the next step, if you decided to make the coat a lot smaller, make the same adjustments to your lining fabric before you continue.
STEP 19
– Place the coat, right side up on a flat surface.
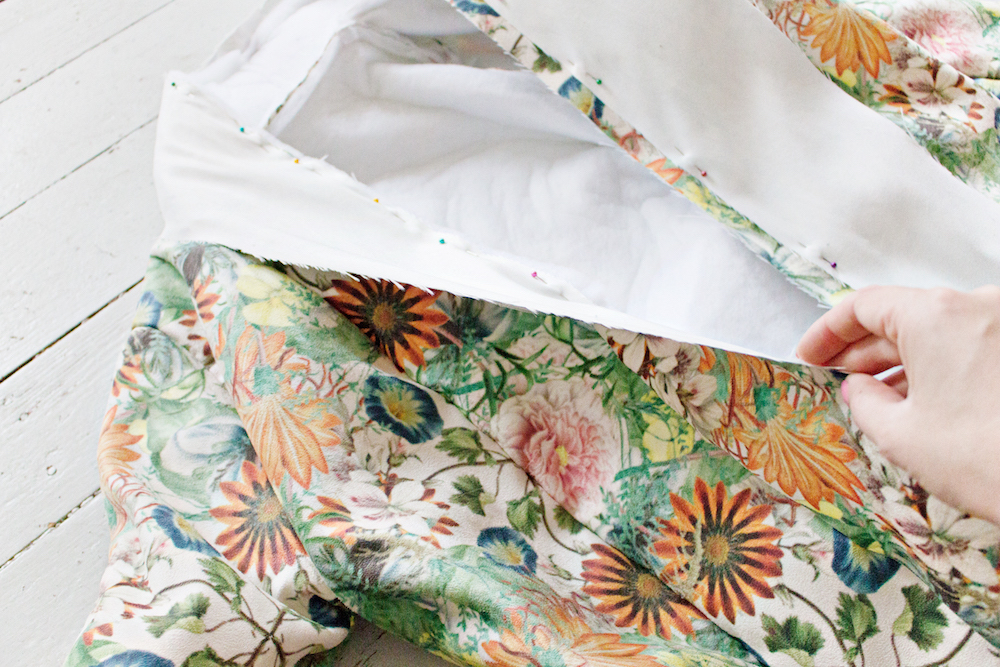
– Place your lining fabric, right side down, on top of the open coat.
– Try to match all of the seams together as possible and pin the front opening of the lining to the suede strip that you folded inwards in step 16 (right sides together)
STEP 20
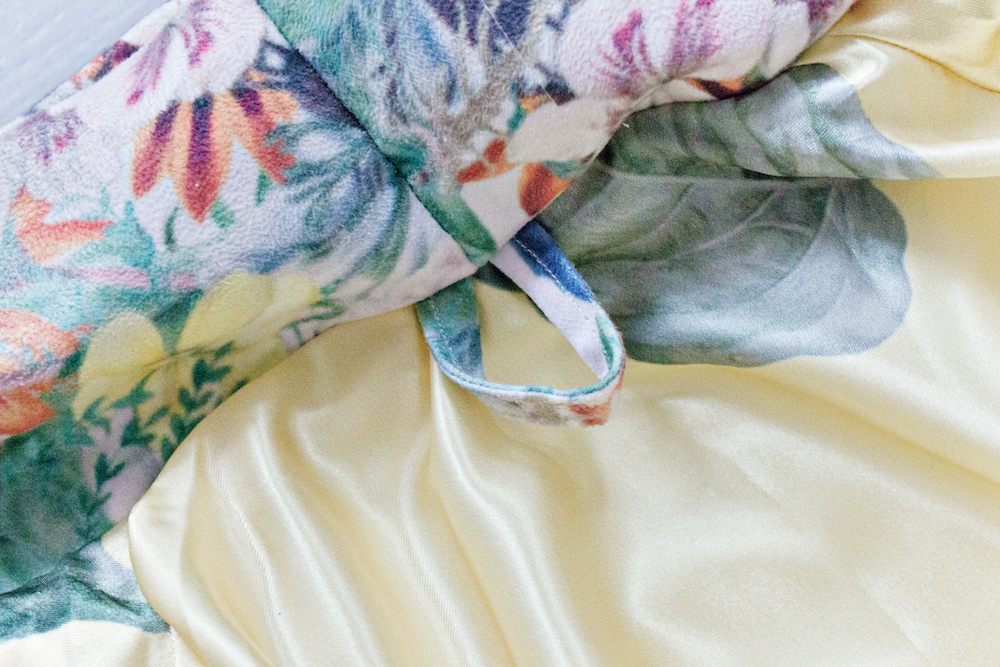
– If you would like to have a loop to hang up your coat, this would be the step to add it.
– Cut a small piece of faux suede and fold it twice horizontally.
– Sew along the middle of the horizontal line.
– Pin the piece to the middle of the neckline between the lining and collar, having the loop stick out on the right sides of the fabric.
STEP 21
– Once you have pinned the strip to the lining, try the coat on to see if there is any tension in the lining. If necessary make any adjustments and sew the pinned parts together.
STEP 22
– Fold the coat right sides out.
STEP 23
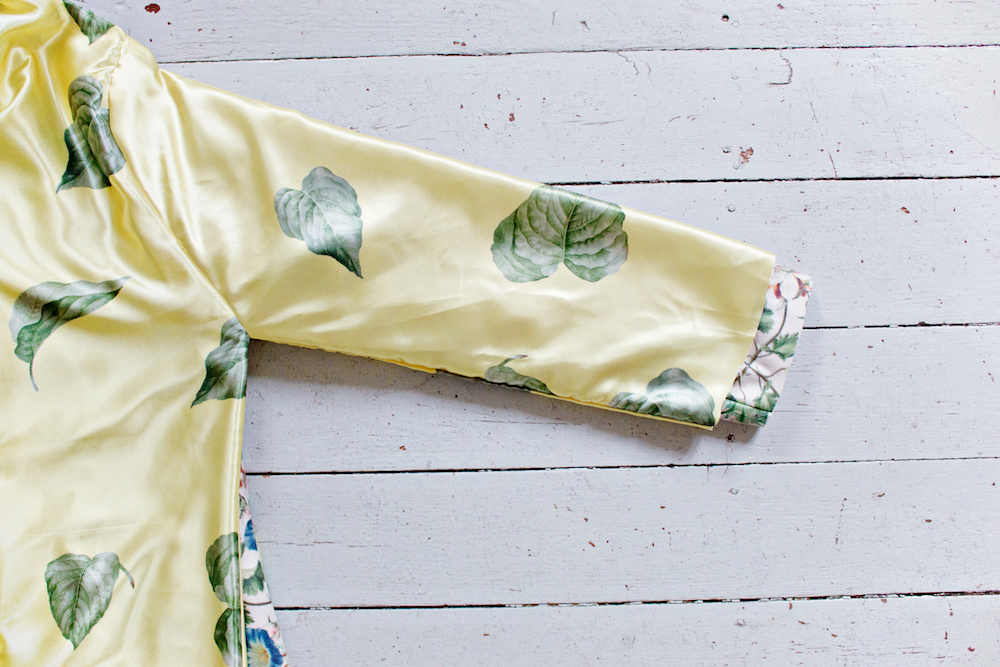
– Take the left sleeve and place it on a flat surface.
– Take the left sleeve of the lining fabric and place it on top of your faux suede sleeve, with the shoulder and side seems aligned.
– Cut the end of the lining sleeve slightly shorter (between 1cm and 2 cm) than the faux suede sleeve.
– Repeat this for the other side.
STEP 24
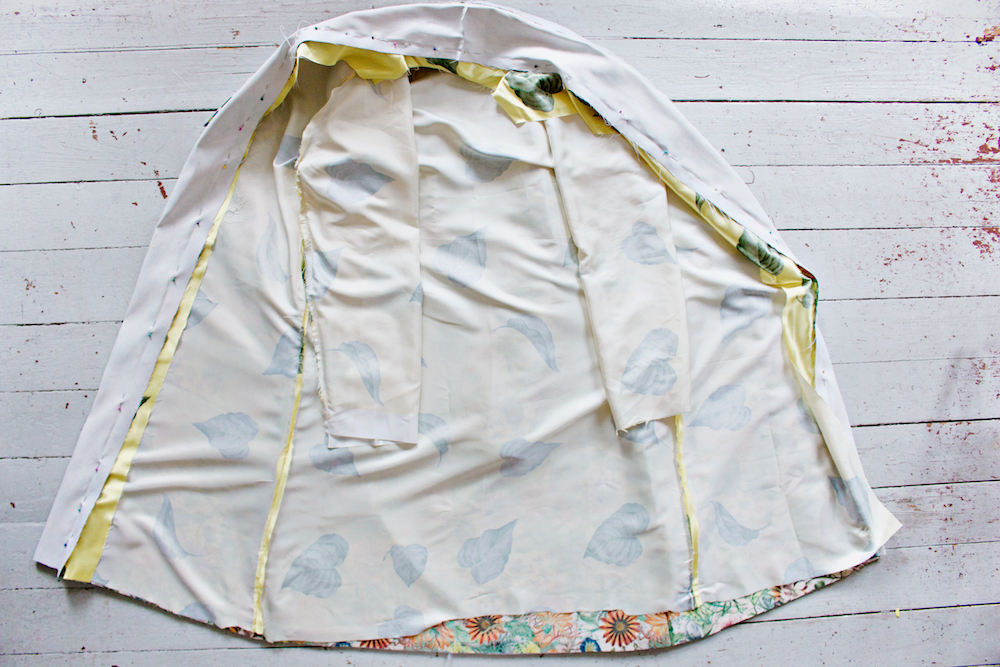
– Fold the coat inside out with both fabrics right sides in.
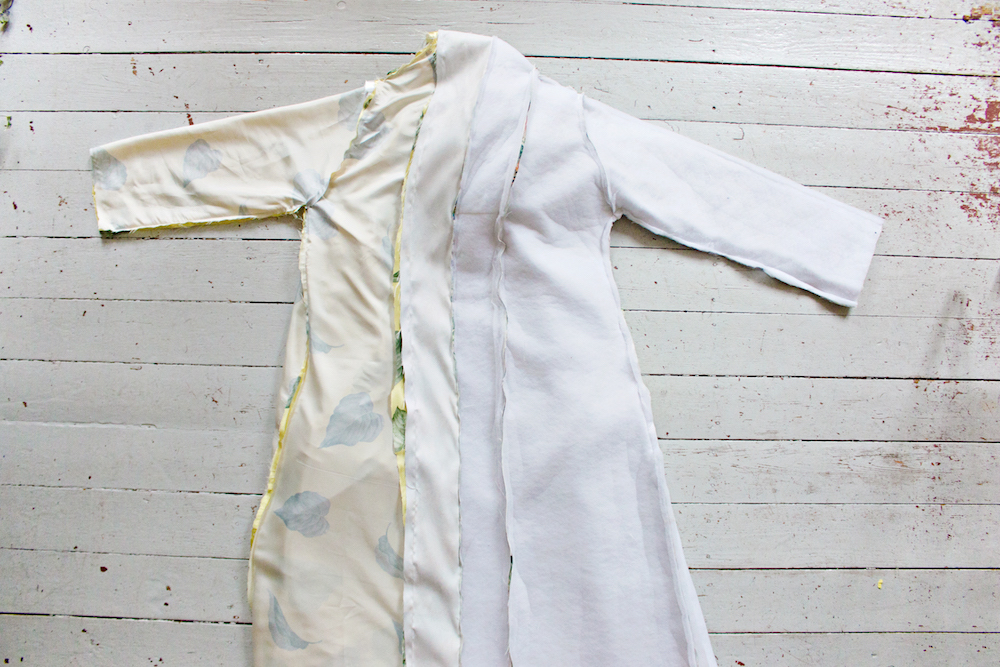
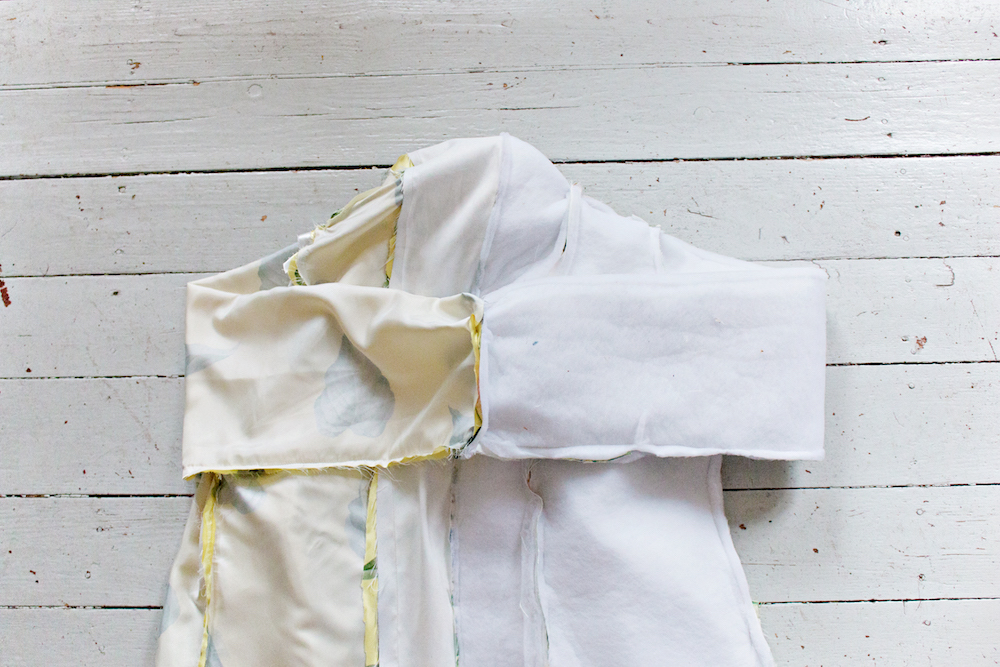
– Place the coat on a flat surface and have the lining fabric on the left and the faux suede fabric on the right, with the sides of the coat in the middle and the sleeves out wide.
STEP 25
– Take the left sleeve of the lining fabric and the left sleeve of the faux suede fabric and place the openings together.
STEP 26
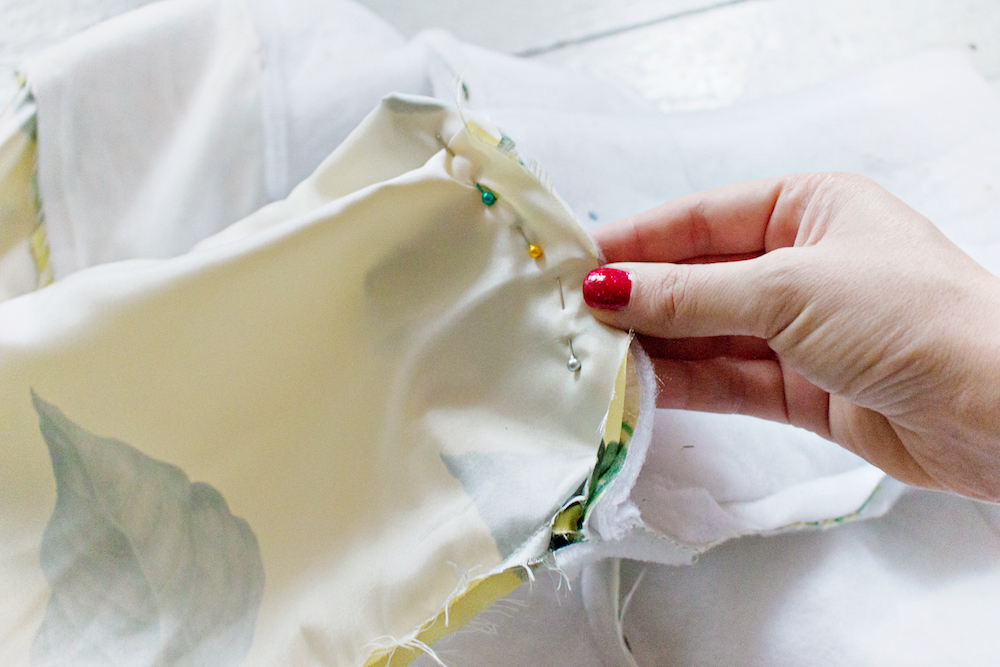
– Pin the openings of the arms together, creating a circle.
– Sew the pinned lines.
– Repeat this for the other sleeves.
STEP 27
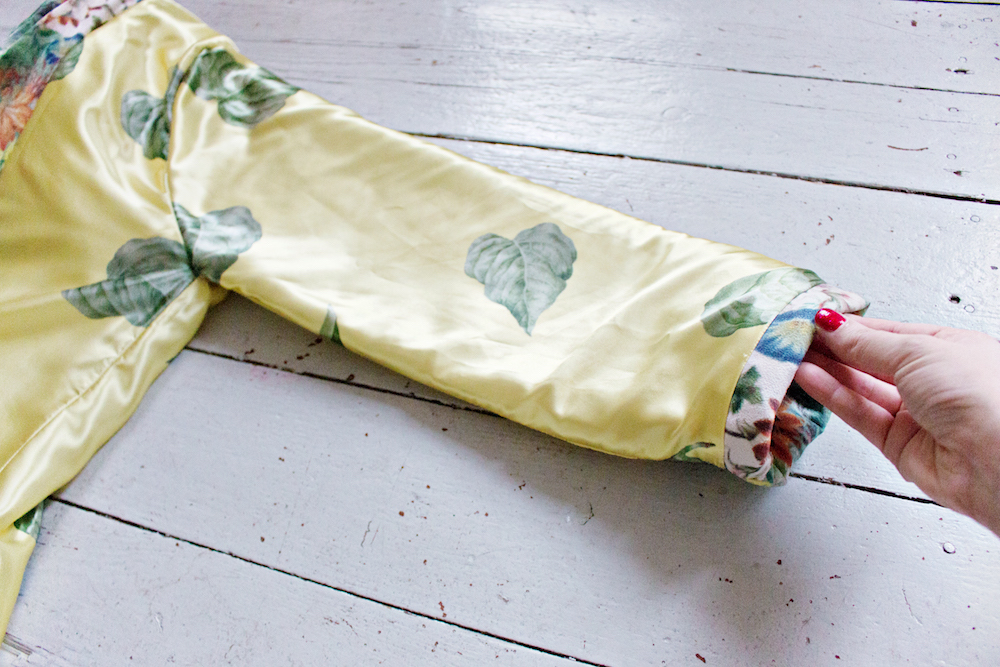
– Fold the coat with the lining on the outside to check if the inside of the sleeves are sewn together correctly.
– You can sew the end of the sleeve or leave it like this.
STEP 28
– Fold the coat right side out.
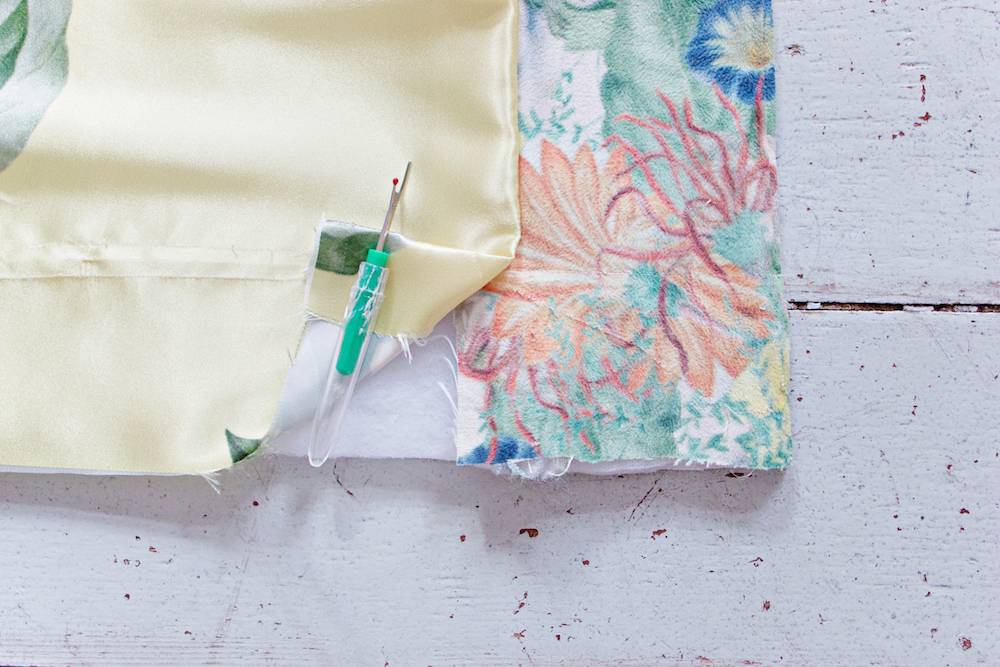
– Open the front of the coat and use a seam ripper or scissors to open approx. 3 cm of the bottom front lining of the coat.
– Repeat this for the other bottom front opening.
STEP 29
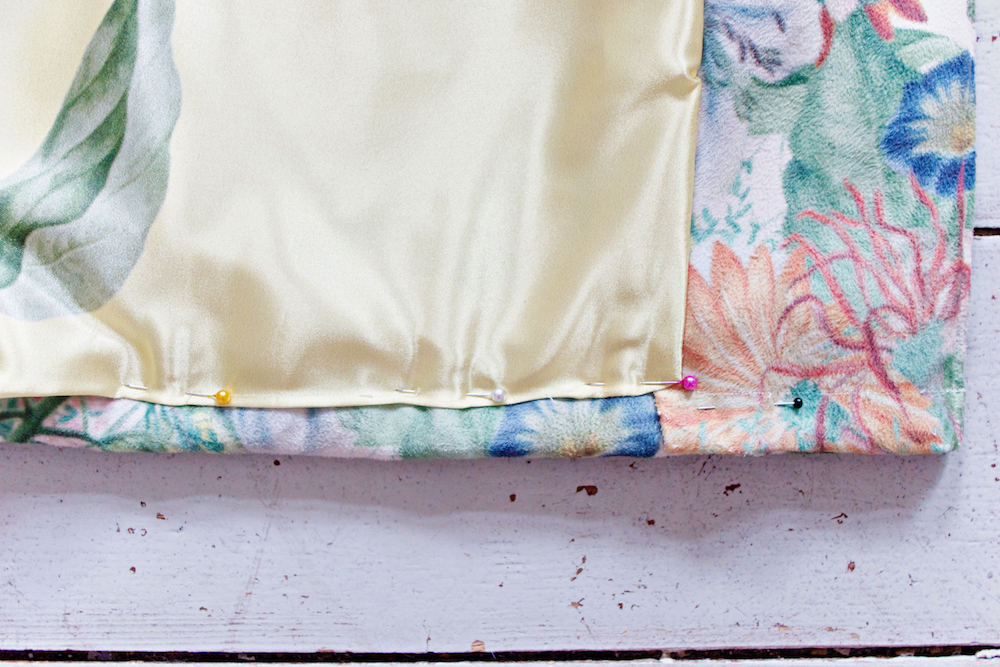
– Fold the lining and the faux suede bottom of the coat inwards and pin them together.
– Try the coat on to see if there is any tension in the lining of the fabric, or if the lining is too loose and is visible at the bottom of the coat. Make any changes if necessary and keep trying it on until it fits perfect.
– Sew the bottom of the coat with your sewing machine, or sew it by hand, to avoid a visible stitch on the outside of the coat.
STEP 30
– Try the coat on and fold the front openings across the front of your body. Find the best fit and mark the points that would keep the openings in place like this with a pin or fabric marker.
– Attach 2 snap buttons to the marked parts with needle and thread.
And that is it! You are a star!
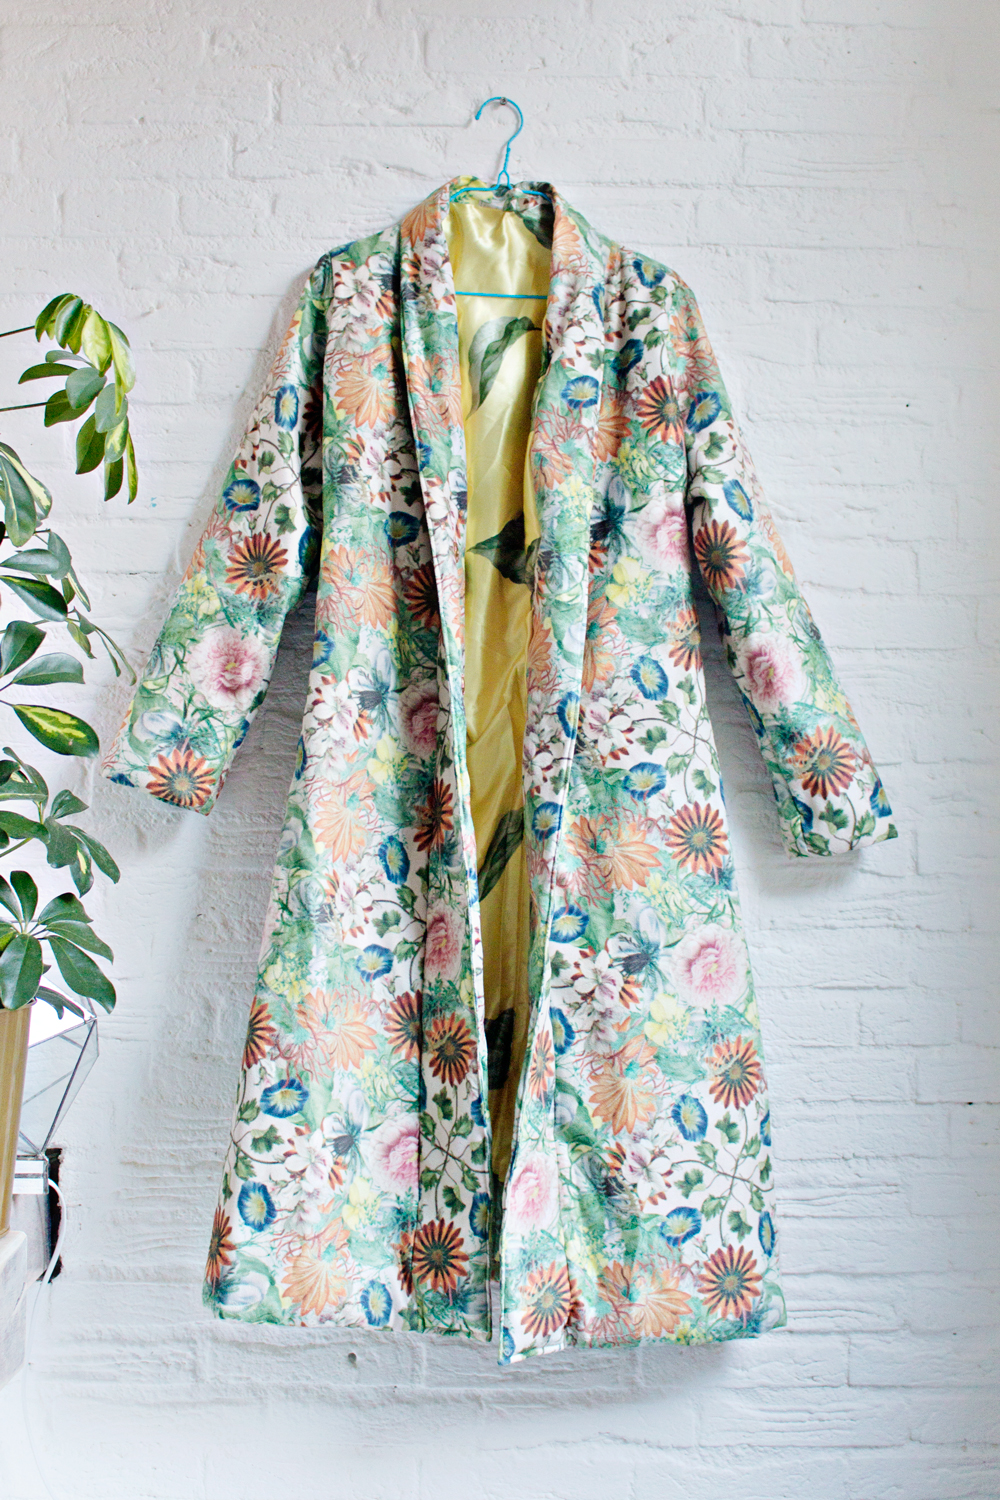
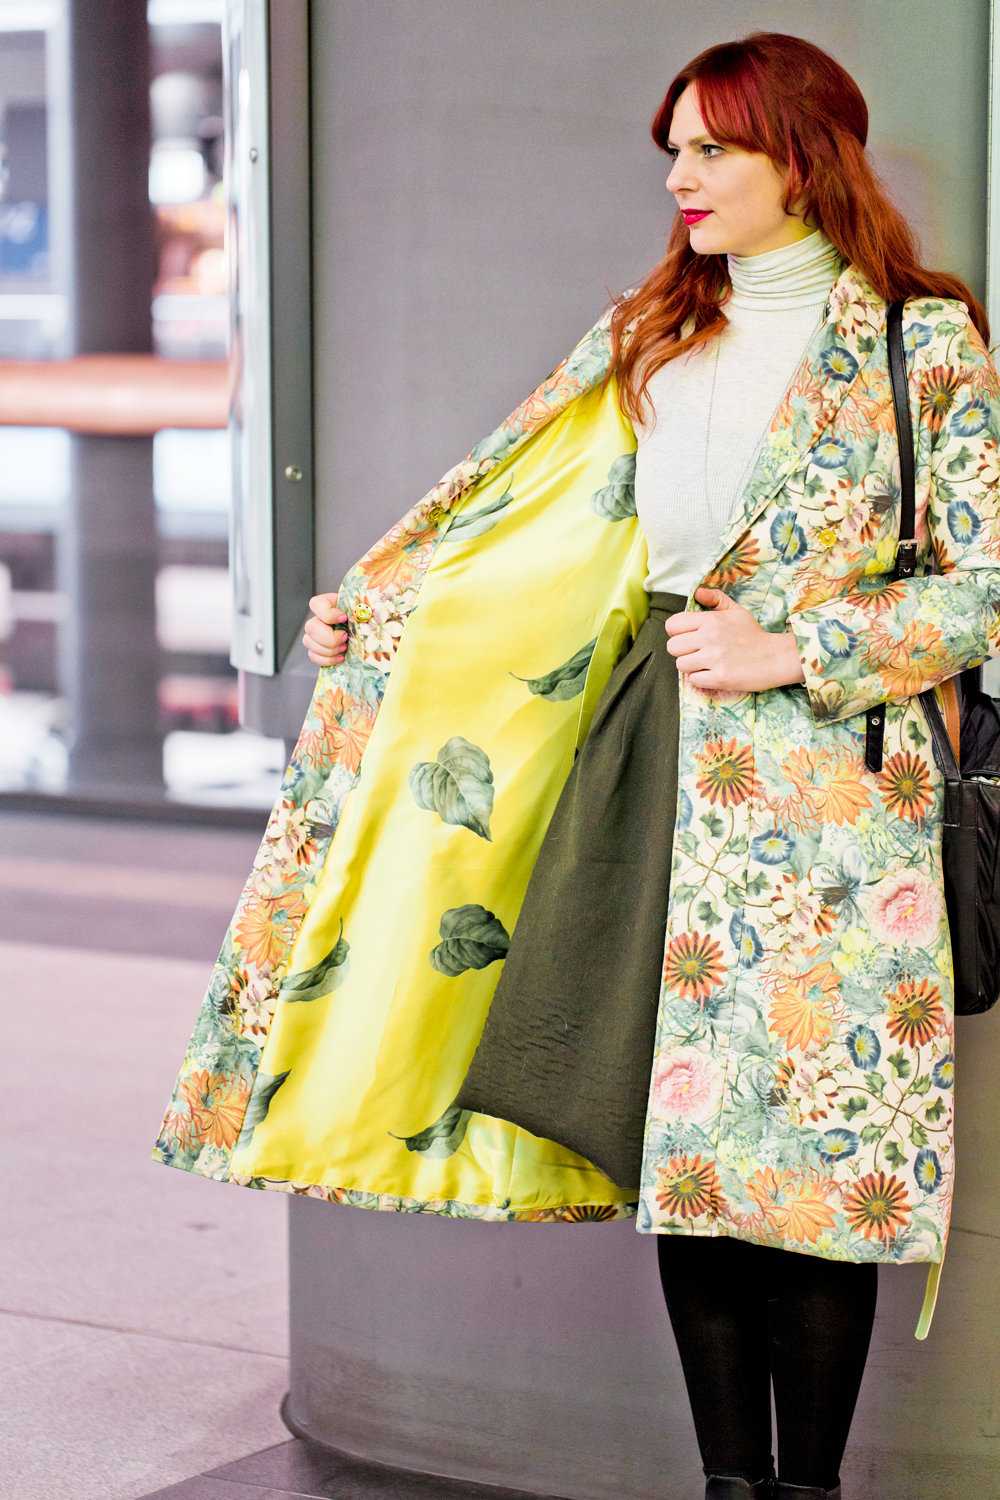
I really love how the coat turned out and it is definitely warm enough for the Berlin winter!
And since this was a very special project I had the talented Matthias of www.der-gottwald.de take the result photos!
Credits
Fabrics by Spoonflower
Photography by www.der-gottwald.de
Studio Photography by Lana Red Studio












4 comments
What a beautiful coat. The satin leaf lining is a lovely finishing touch
Thank you for sharing all the sewing process.
Looks fabulous and thank you for posting. In Step 3, when you are cutting the coat down the middle, you should say cut it vertically, not horizontally.